Programming
In order to generate a program code from a decision table, at least one corresponding source element must be present for each condition and each action. See also Preconditions for program code generation
Numerous optional source elements furthermore ensure that more complex or nested components can also be generated directly from LF‑ET.
|
This decision table should serve as the template for the clarification of programming and code generation with LF‑ET: The new status should be agreed on the basis of the current status of traffic lights. |
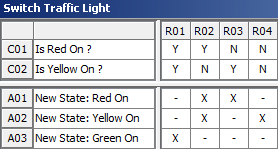
To be able to generate the program code from the decision table, the following source elements must be defined only once e.g. for Java:
|
Determining programming languages
In the case of every decision table you can determine individually for which programming languages source codes are to be generated.
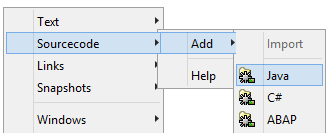
If only the ‘Add’ submenu item is shown under the ‘Source code’ menu item, this means no programming languages have been selected for the current decision table.
All programming languages licensed for LF‑ET are made available for selection under ‘Add’; in our example, ‘Java’ is selected:
Once programming languages have been selected and used, they appear automatically under the ‘Source code’ menu item. In our example, ‘Java’ is now displayed as a programming language which has been used:
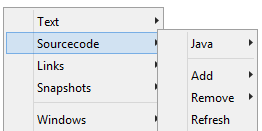
The ‘Update’ function refreshes the list of programming languages used, in particular, languages that have been selected but not used are removed from the list.
Icons
The following icons are used to navigate over source codes:
| Icon | Meaning |
|---|---|
|
Must (mandatory) source code is not defined |
|
Must (mandatory) source code is defined |
|
Optional source code is not defined |
|
Optional source code is defined |


Conditions
In the case of every condition a logical argument must be defined for the desired programming language.
A logical argument is defined as the expression provided between IF and THEN: IF logical argument, THEN.
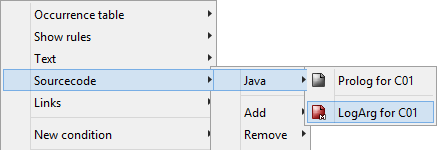
From the context menu for each condition, selecting Source code > Language > LogArg for… opens the internal Source code editor and the logical argument can be entered or edited:
|
In the case of extended conditions for the final value (the 'else value') no logical argument should be defined – just as in the case of the ‘no value' of a restricted condition. If there is no logical argument for the final value, LF‑ET generates an ELSE-statement automatically. The definition of logical arguments for these “else values’ is not recommended; the possibility of doing so has only been retained so that – historically – existing decision tables containing extended conditions need not necessarily be changed. |
|
|
Additional information |
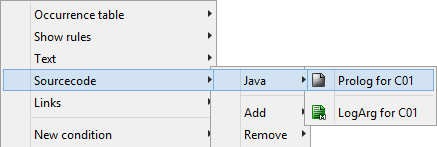
Prolog condition (optional)
A “prolog” (preprocess) can be defined for each condition. When code lines are generated, this prolog is integrated directly into the source code in front of the corresponding condition.
A condition may be preceded by an arbitrarily complex process, e.g. DB accesses, calls, evaluations, calculations, …
|
Actions
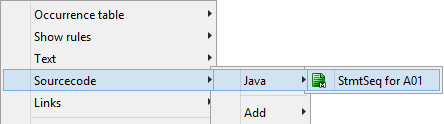
In the case of every action at least one statement must be defined for the desired programming language.
In the context menu of all cells of an action the corresponding editor can be opened and the source code entered under Source code > Language > StmtSeq…
|
Additional information: |
Prolog decision table (optional)
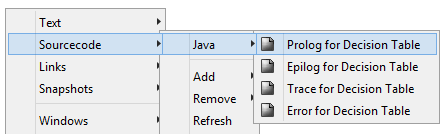
A “prolog” (preprocess) can be defined for a decision table. It is used as the first statement sequence in the generated program code.
In principle, the decision table prolog (with epilog) can be understood as a “shell” in which opening (prolog) and closing (epilog) definitions, statements, brackets etc. can be used.
In the context menu of the header of a decision table the corresponding editor can be opened and the source code entered under Source code > Language > Prolog…
|
Additional information: |
Epilog decision table (optional)
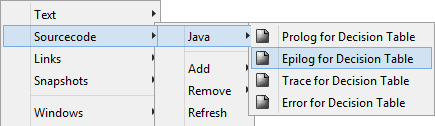
An “epilog” (post process) can be defined for a decision table. It is used as the last statement sequence in the generated program code.
In the context menu of the header of a decision table the corresponding editor can be opened and the source code entered under Source code > Language > Epilog…
|
Additional information: |
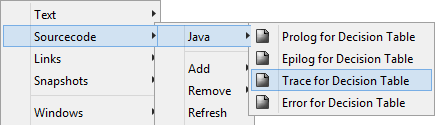
Trace/Debug (optional)
A trace/debug code can be defined for a decision table. This source code is generated as the first statement sequence in every rule and is thus executed for the runtime prior to actions.
A detailed analysis of executed decision tables and their rules is possible thanks to the use of placeholders.
- This serves as powerful support for
-
-
Tracing and debugging of complex processes.
-
Statistical analyses e.g. for determining the level of test coverage.
-
In the context menu of the header of a decision table the corresponding editor can be opened and the source code entered under Source code > Language > Trace…
|
Hints and tips:
|
|
Additional information: |
Error handling (optional)
It may only happen in the case of such decision tables that none of the rules is executed and LF‑ET generates a corresponding checking mechanism in the program code that checks rule execution. If no rule has been executed, error handling is triggered. You can determine individually what exactly happens in the case of such error handling.
In order to be able to use your own error handling, you must either enter an individual error code in the decision table or create an ini file with the corresponding error.
Contents of this chapter:
Individual error handling
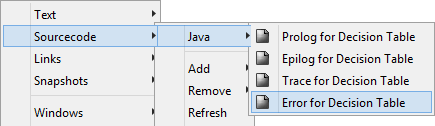
In the context menu of the header of a decision table the source code can be entered by clicking Source code > Language > Error…
|
Additional information: |
INI file for error handling
To ensure the secure and systematic handling of errors when generated program code is executed, there is a customizable, in-built error handling functionality in LF‑ET. depending on the configuration, one of three possible error handling procedures is used during program code generation:
To take into consideration the error code during generation of the program code, LF‑ET follows the following sequence:
| Sequence | Action |
|---|---|
1. |
Search for error codes contained directly in the decision table. If there are none, … |
2. |
…search for an error profile LFET.<Programming language>.Error.ini (Example for Java: "LFET.Java.Error.ini") if no ini file is found, finally… |
3. |
…LF‑ET – standard error handling is used |
The variant used is explained in detail in the form of a comment in the generated program code.
|
Additional information: |
Integrated source code editor
There is an integrated editor in LF‑ET for the processing of source codes in which all text editing mechanisms and navigation elements are available.
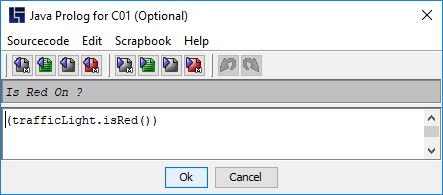
To facilitate navigation, the following are specified in the title line of the source code being processed: the programming language and the assignment to a condition, action, etc.
Icons used for navigating over source codes can be found in the symbol bar. You can e.g. go directly to the next source code, to the next mandatory source code or to the next empty mandatory source code.
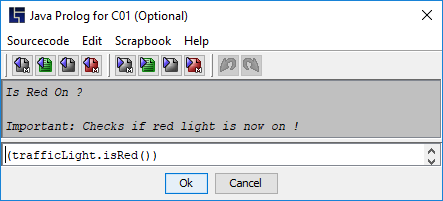
The respective technical description for the source code to be entered is displayed in the gray box below the symbol bar. This text area is not editable and contains important information that considerably supports the programming or code review. Hence, there is no need to exit the editor in order to save all sources and texts.
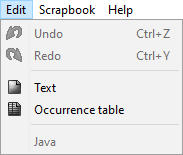
You can switch directly to texts, value tables and other programming languages via the menu bar and Edit.
|
Alternatively, all source codes can be edited “externally” in any development environment. For more information see the section: External programming |
Contents of this chapter:
Expanded text display
The section Texts shows how extra information in text form can be added to elements of a decision table.
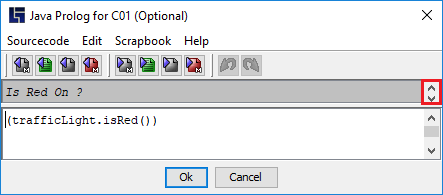
When processing source codes this additional text information can be displayed. In the example below, the title of a condition can only be seen via the entry area of the source code. However, the up and down pointing arrows on the right-hand side indicate that there is additional text.
Contents of this chapter:
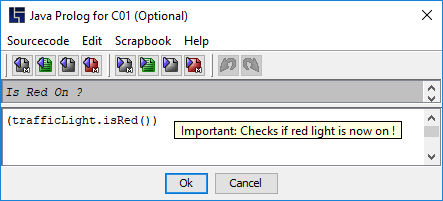
Possibility 1: as a tooltip
If you want to see the text only briefly, you can place the mouse pointer on the text and display the underlying text as a tooltip.
|
Additional information: |
Navigation over source codes
There is an integrated editor in LF‑ET for the processing of source codes in which all text editing mechanisms and navigation elements are available.
|
There is no need to exit the editor in order to navigate over source codes. Icons used for navigation can be found in the symbol bar. They have the following meaning: |
| Toolbar icon | Explanation |
|---|---|
|
Switch to previous source code ( CTRL+PAGE UP ) |
|
Switch to next source code ( CTRL+PAGE DOWN ) |
|
Switch to previous filled source code ( CTRL+SHIFT+PAGE UP ) |
|
Switch to next filled source code ( CTRL+SHIFT+PAGE DOWN ) |
|
Switch to previous mandatory source code |
|
Switch to next mandatory source code |
|
Switch to previous empty mandatory source code |
|
Switch to next empty mandatory source code |


Key combinations in the source code editor
| Toolbar icon | Explanation |
|---|---|
F1 |
Launch Help |
CTRL+F1 |
Launch Help separately |
ALT+F4 |
Save and exit editor |
CTRL+A |
Select the whole editor area |
CTRL+PAGE DOWN |
Go to next source code |
CTRL+PAGE UP |
Go to previous source code |
CTRL+SHIFT+PAGE DOWN |
Go to next filled source code |
CTRL+SHIFT+UP |
Go to previous filled source code |
CTRL+C |
Copy selected character string to clipboard |
CTRL+G |
Save current decision table and generate current language |
CTRL+ALT+G |
Save and exit source code editor and display scrapbook menu |
CTRL+SHIFT+G |
Save current decision table and generate all languages |
CTRL+S |
Save and exit source code editor |
CTRL+V |
Paste character string copied to clipboard |
CTRL+X |
Cut character string and copy to clipboard |
CTRL+Y |
Redo changes |
CTRL+Z |
Undo changes |