Program generation
If a decision table is correct and all mandatory sources are filled or the interface generation is used, then program code can be generated.
Generating program code
The simplest way to start program code generation for an already opened decision table is to use the key combination CTRL+G (Save + Generate). This functions on all screens and starts saving the decision table with subsequent generation of the source file. An example here for Java:
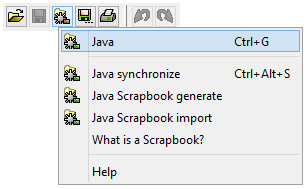
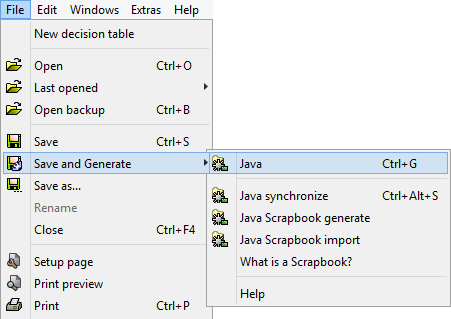
If the generation variant Interface is not used, then it is imperative for successful generation that all "must" sources are filled (see also Preconditions and Programming). missing "must" sources in newly inserted conditions or actions are often the cause of error messages during generation.
|
Only if the interface generation is not used: In order to check the "look & feel" of the generated program code in advance even without programming, the missing mandatory source codes can be generated most quickly via Generate Scrapbook followed by immediate Read Scrapbook. The automatically generated source codes are only compilable "dummies" and must be replaced later by "real" statements. |
More than one language
If more than one language is activated in a decision table, in this example the Java and C# languages, an expanded generation menu is displayed:
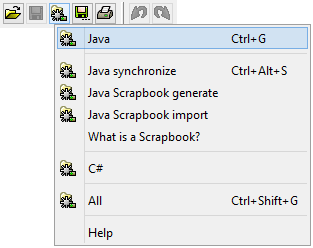
The language used most recently, in this case Java, is listed first and linked with the key combination CTRL+G. The scrapbook functions are also offered for this language.
Alternatively, generation for another language (in this case C#) or generation for all languages activated in this decision table can be selected from this menu.
The protocol screen
The individual generation steps appear on a protocol screen:
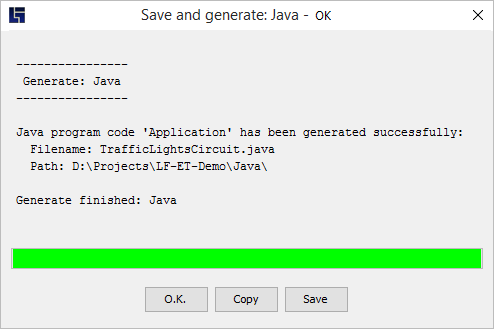
Click the OK button when you want to close the protocol screen. Otherwise, it automatically closes after 10 seconds. The screen does not close automatically if the user has ‘touched’ it, e.g. by clicking or moving the text area.
Optionally, you can save the whole screen as a file or copy it to the system clipboard.
If errors occur during generation, these also appear on the protocol screen and the progress bar changes to red:
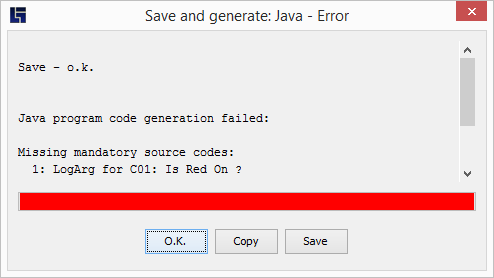
|
You can use the corresponding icons in the source code editor to jump directly to missing source codes: |
|
Jump to previous empty mandatory source code |
|
Jump to next empty mandatory source code |


The generated program code
By default, the generated source code is stored in the file system in the folder containing the decision table. The name of the decision table is used as the file name. The respective extension depends on the language selected.
Optionally, the generation can also be adjusted to meet any project requirements:
-
Individual file names and/or extensions
-
Storage of the generated source code in a different location.
-
Storage of the generated source code in the system clipboard
-
Automatic start of own scripts for individual subsequent processing, e.g. file transfers, compilations, execution of test suites, etc.
Placeholders
Placeholders are characters or strings that will later be replaced with specific data in the source code. For LF‑ET, placeholders begin with "$$". The following placeholders are currently available:
| Placeholder | Meaning |
|---|---|
$$Datn |
The date of the generation timestamp in the numerical format YYYYMMDD. |
$$DtName |
The name of the decision table. |
$$Footer |
Decision table footers (these mark the end of the generated source code). |
$$Header |
Decision table headers with important information such as the generation date and time. |
$$LastRuleID |
The highest rule ID in the decision table. It can also be regarded as the technical version number of the decision table. |
$$Nr |
Number of the condition or action. |
$$OccNr |
The number (position) of a condition value or action value in the values table. This makes it easier to program source codes for condition values or action values when they differ only by this one value: |
$$Rule |
The rule number of the currently generated rule, i.e. the number of the rule column, see also: Standard sorting. |
$$Rules |
The current count of rule columns in the decision table. |
$$RuleID |
The rule ID of the currently generated rule together with the LastRuleID of the decision table, with the format: #nn.mm (nn=RuleID, mm=LastRuleID). The format facilitates later automatic statistical analyses. |
$$Symbol |
The symbol of condition or action values. |
$$Timn |
The time of the generation timestamp in the numerical format HHMMSS. |
$$Title |
The title of condition or action values |
$$Version |
The timestamp of the source code generation, with the date and time separated by a point, e.g.: 20140307.115613. |
Upper case / lower case is irrelevant when using placeholders. When program code is generated, the placeholders are replaced with the actual values at that time.
An example for Java: Generation of rule 5 of 10 for decision table “Test”:
| Source code in DT | generated source code |
|---|---|
System.out.println("$$EtName, $$Version, $$Rules, $$Rule"); |
System.out.println("Test, 20240721.115613, 10, 5"); |
Generation parameters
Generation parameters are program-language specific information, such as the setting of the file name and extension for the generated source code.
|
Source transfer
With ‘open’ development environments, which manage software objects in the file system, special mechanisms for source transfer are generally unnecessary since LF‑ET objects in the file system can in any case be written and read without problems.
The situation is different with ‘closed’ development environments that manage the software object e.g. in databases: JDeveloper, SQL Developer, NetWeaver, Natural, etc.
For Natural, LF‑ET can, for example, automatically log into the development environment via an integrated NDV adapter and then save, compile and read the source code. As a more powerful alternative to complex adapters, LF‑ET can use a function of the operating system:
The system clipboard
With generation parameters in the configuration file Project.ini, you can activate and configure the automatic use of the system clipboard for a programming language:
- ide.language.clipboard=true
-
This generation parameter activates the additional use of the system clipboard during source generation and scrapbook import.
Effect during generation:
First, the source file is generated “completely normally”, then the source code is also automatically copied to the system clipboard. After you have switched to the editor in the development environment, the source code can be pasted directly there, e.g. using the key combination CTRL+V.
Effect during import:
First, the system clipboard is checked. If it contains a generated source code in the current language, that source code is imported from the system clipboard. Otherwise, the source file is found in the file system and imported from there. - ide.language.clipboard.encoding=…
-
Optionally, the system clipboard can be used to define an encoding for the IO that is different from the operating system encoding.
The encodings available in the system can be viewed using the menu bar under Help > Details > application info > LookAndFeel [nnn available encodings]. - ide.language.clipboard.suppressFile=true
-
Optionally, you can use the system clipboard to prevent the source file from being saved in the file system.
To activate automatic use of the clipboard e.g. for ABAP, you have to specify the following parameters in the Project.ini configuration file.
ide.abap=true
ide.abap.clipboard=true
The first parameter is a so-called “base key”. It determines whether special settings should be considered for a particular language. All other parameter for this language are only analyzed if the “base key” is assigned the value true.
|
See also: |
The LF‑ET Maven plugin
Especially for code generation with Maven an LF‑ET-Maven plugin is available, the latest version incl. documentation can always be downloaded here:
LF‑ET is integrated in the Maven plugin, i.e. to use new generation options it may be necessary to update not only LF‑ET at the developer’s but also the plugin in the development environment in parallel.
Installation, configuration and usage is described in a PDF document included with the plugin.